
Van Dwelling
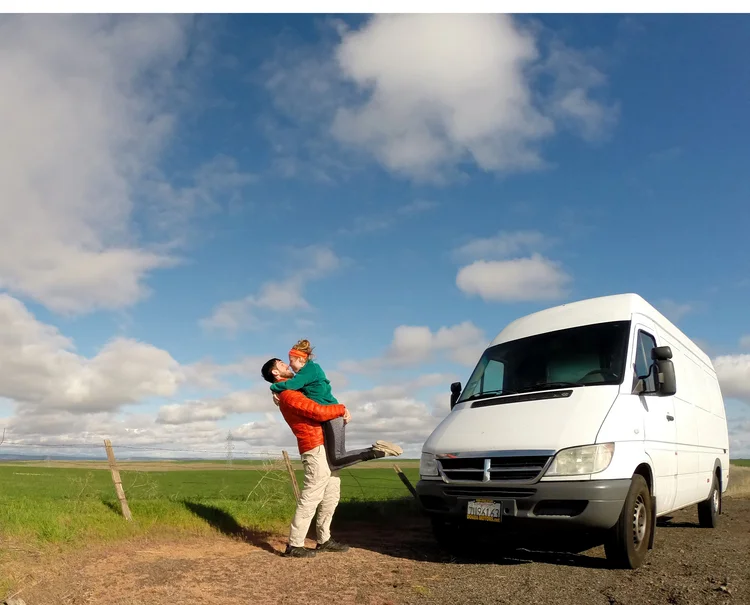
The road to vanlife is different for everyone. That's one of the things we like most about it. Everyone finds their own reason to move into a home on four wheels. What would lead us to move from a comfortable house into a van you might ask? Well, one of our cars was stolen and we decided to replace it with a Sprinter. Then came the novel thought, why don't we move into the van for the final year of my residency? We've been renting for the past four years and the idea of being able to put that money towards our crushing student loans sounded pretty good. To make a long story short, we'll jump forward to where we converted a FedEx Sprinter van into a home with the help of our families. While we can't wait to be free and wandering the roads of various countries, for now we're working full time and saving money on rent to put towards our loans. We hope that wherever this finds you, you're pursuing a life of purpose and won't be too afraid to consider going down an unusual path. To vaguely quote Robert Frost, choosing the road less traveled can make all the difference. From our tiny home to yours, we wish you a meaningful journey.
- Justin
Mini Van Tour
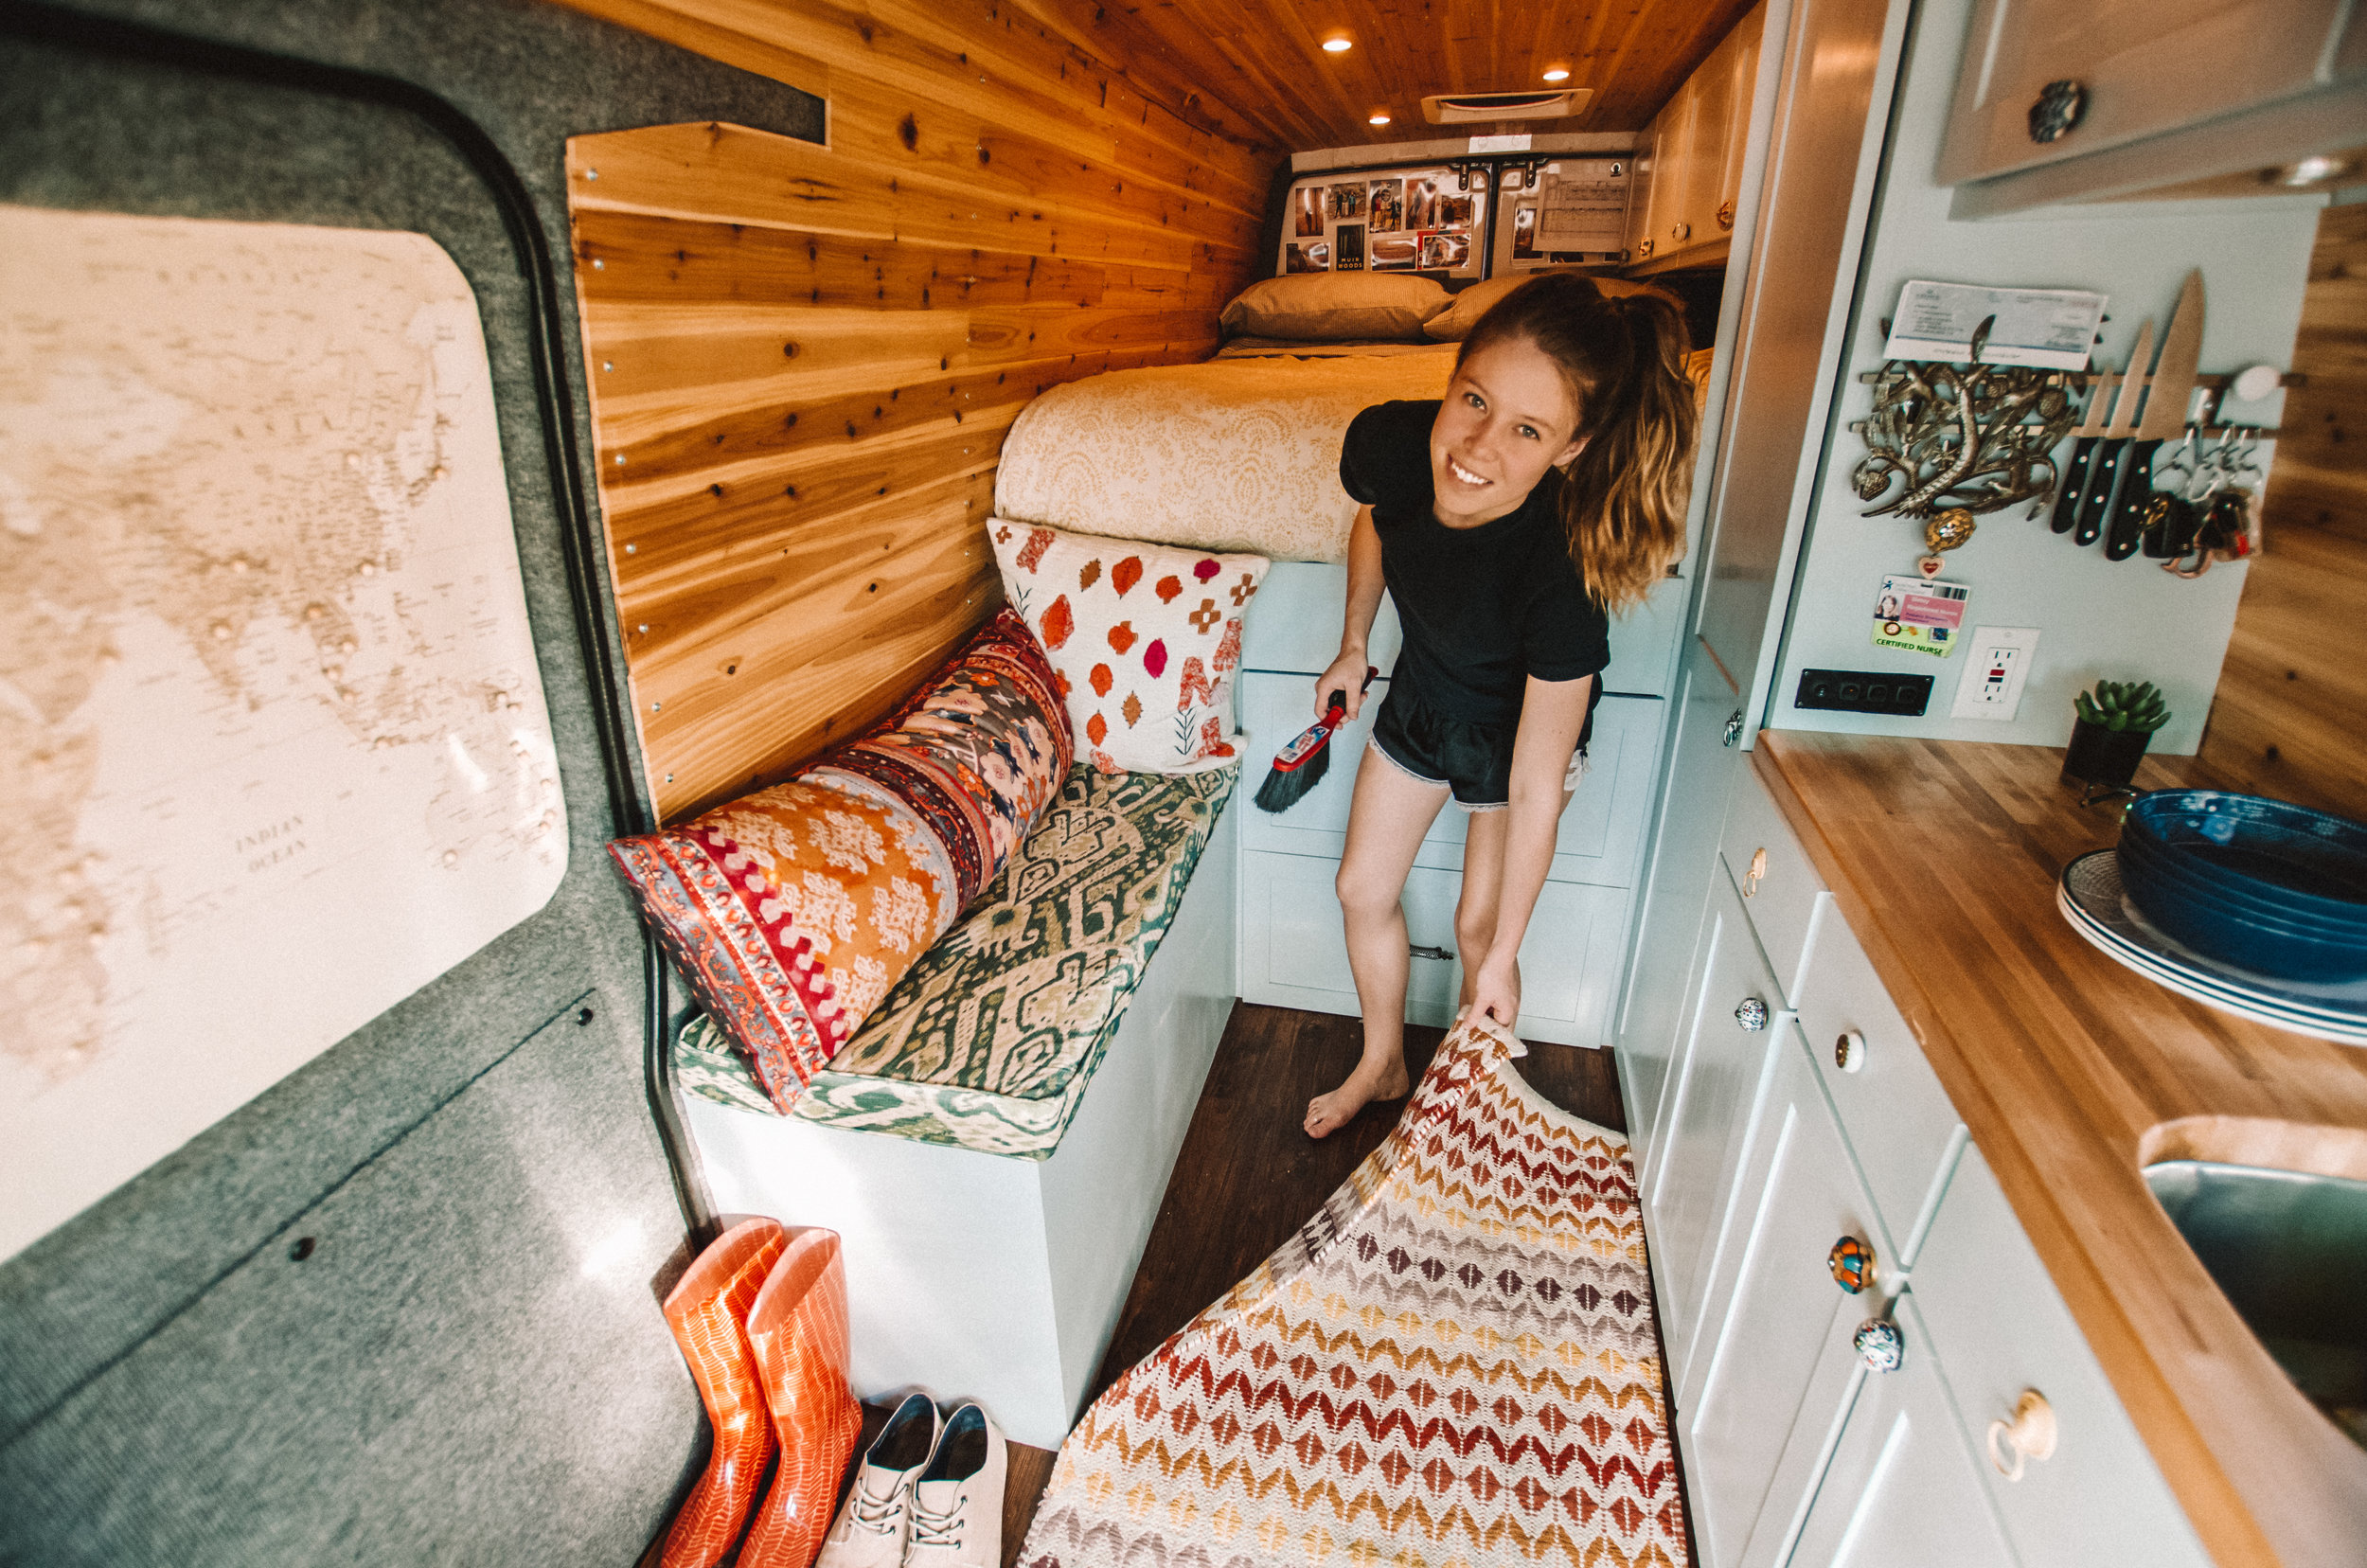
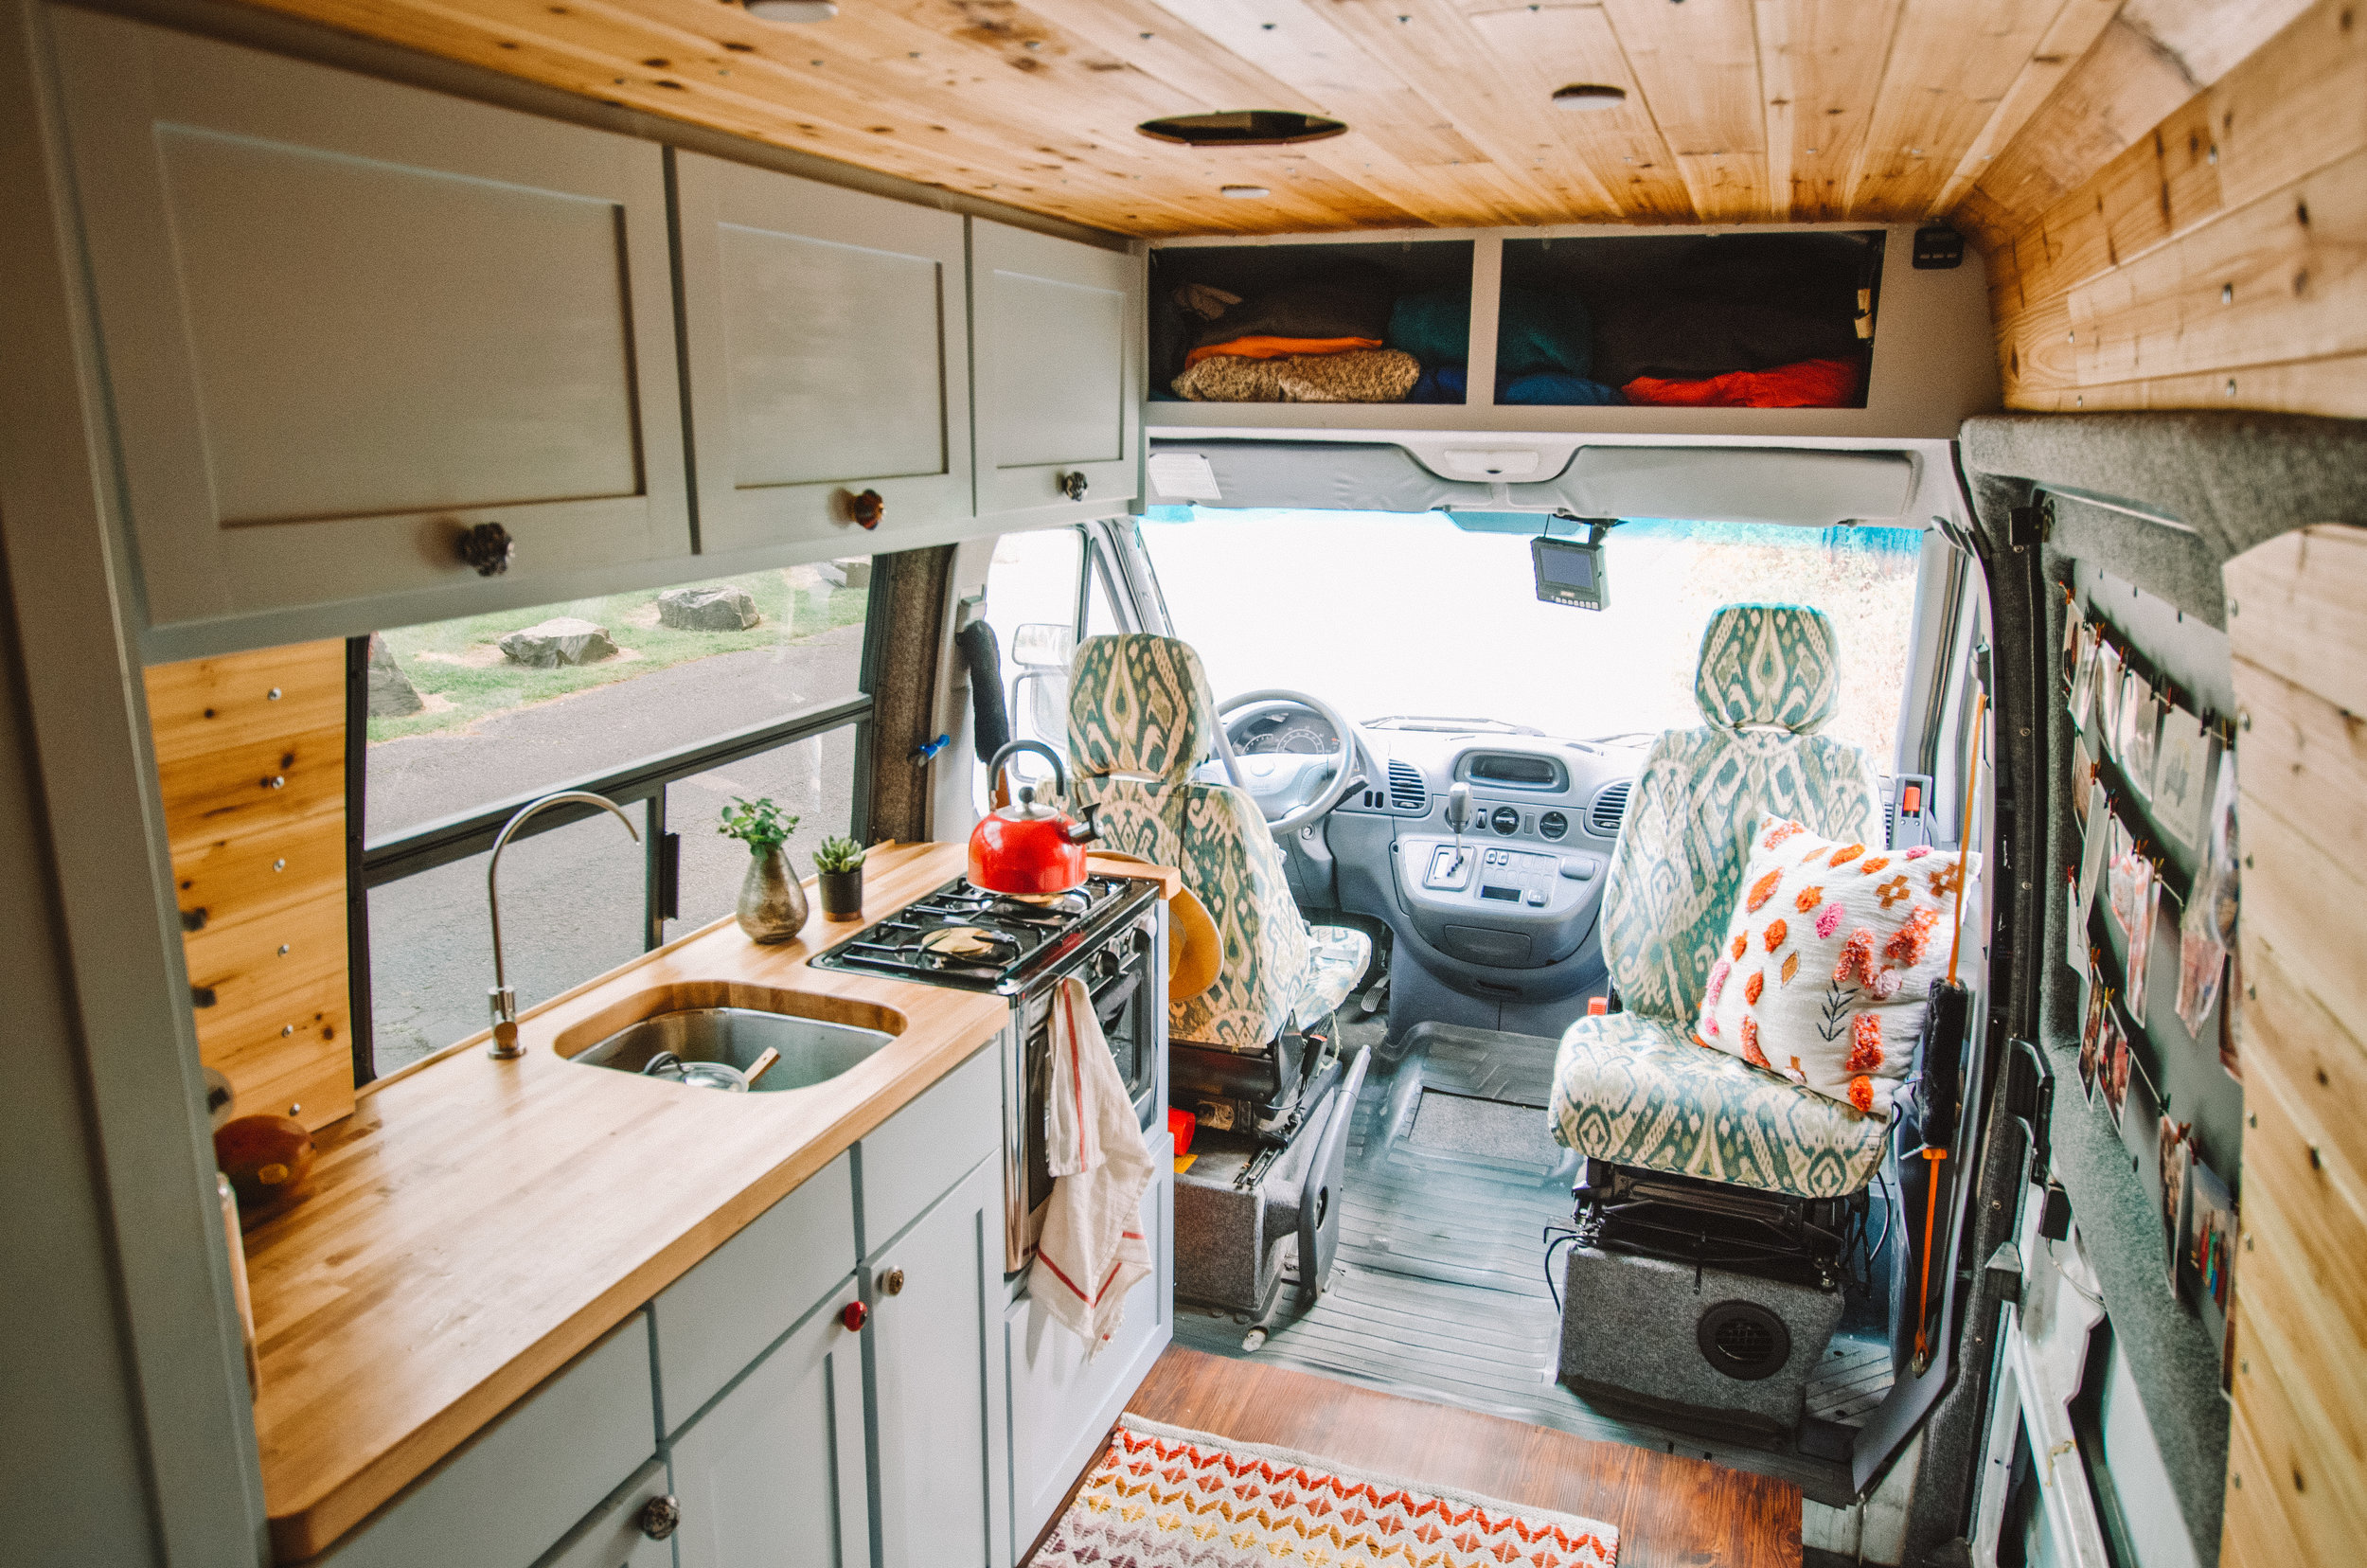
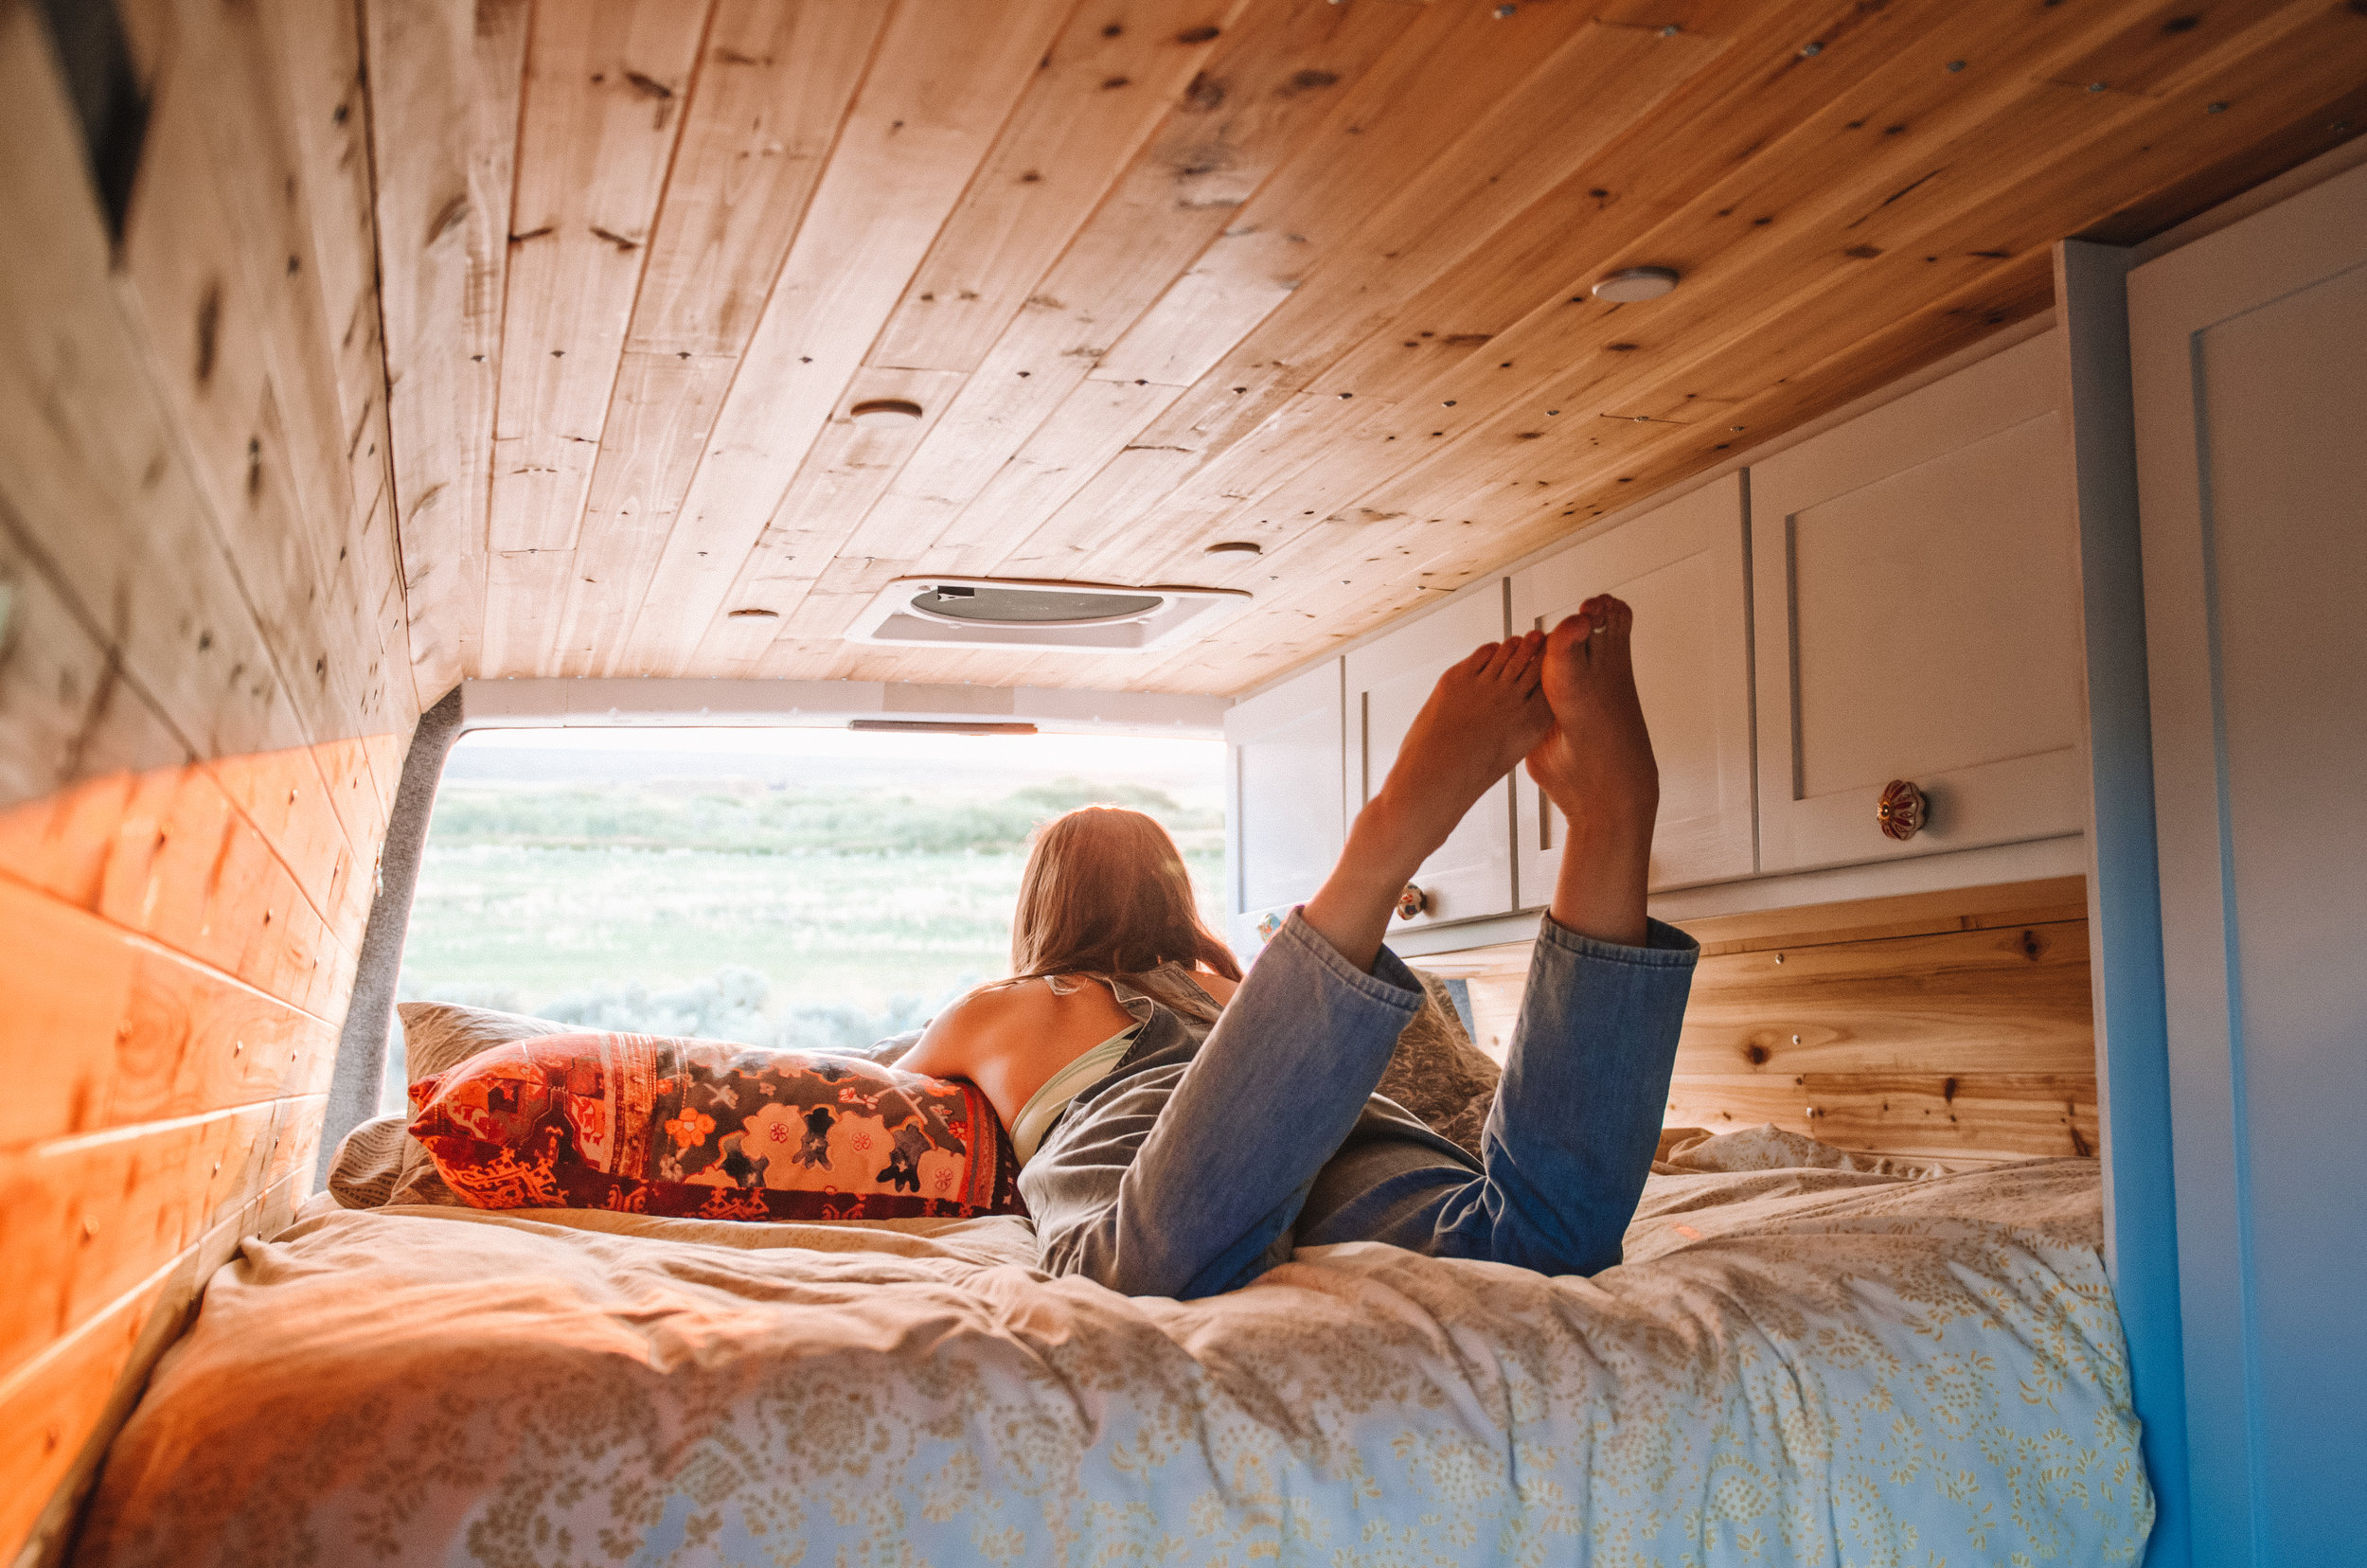
Gallery
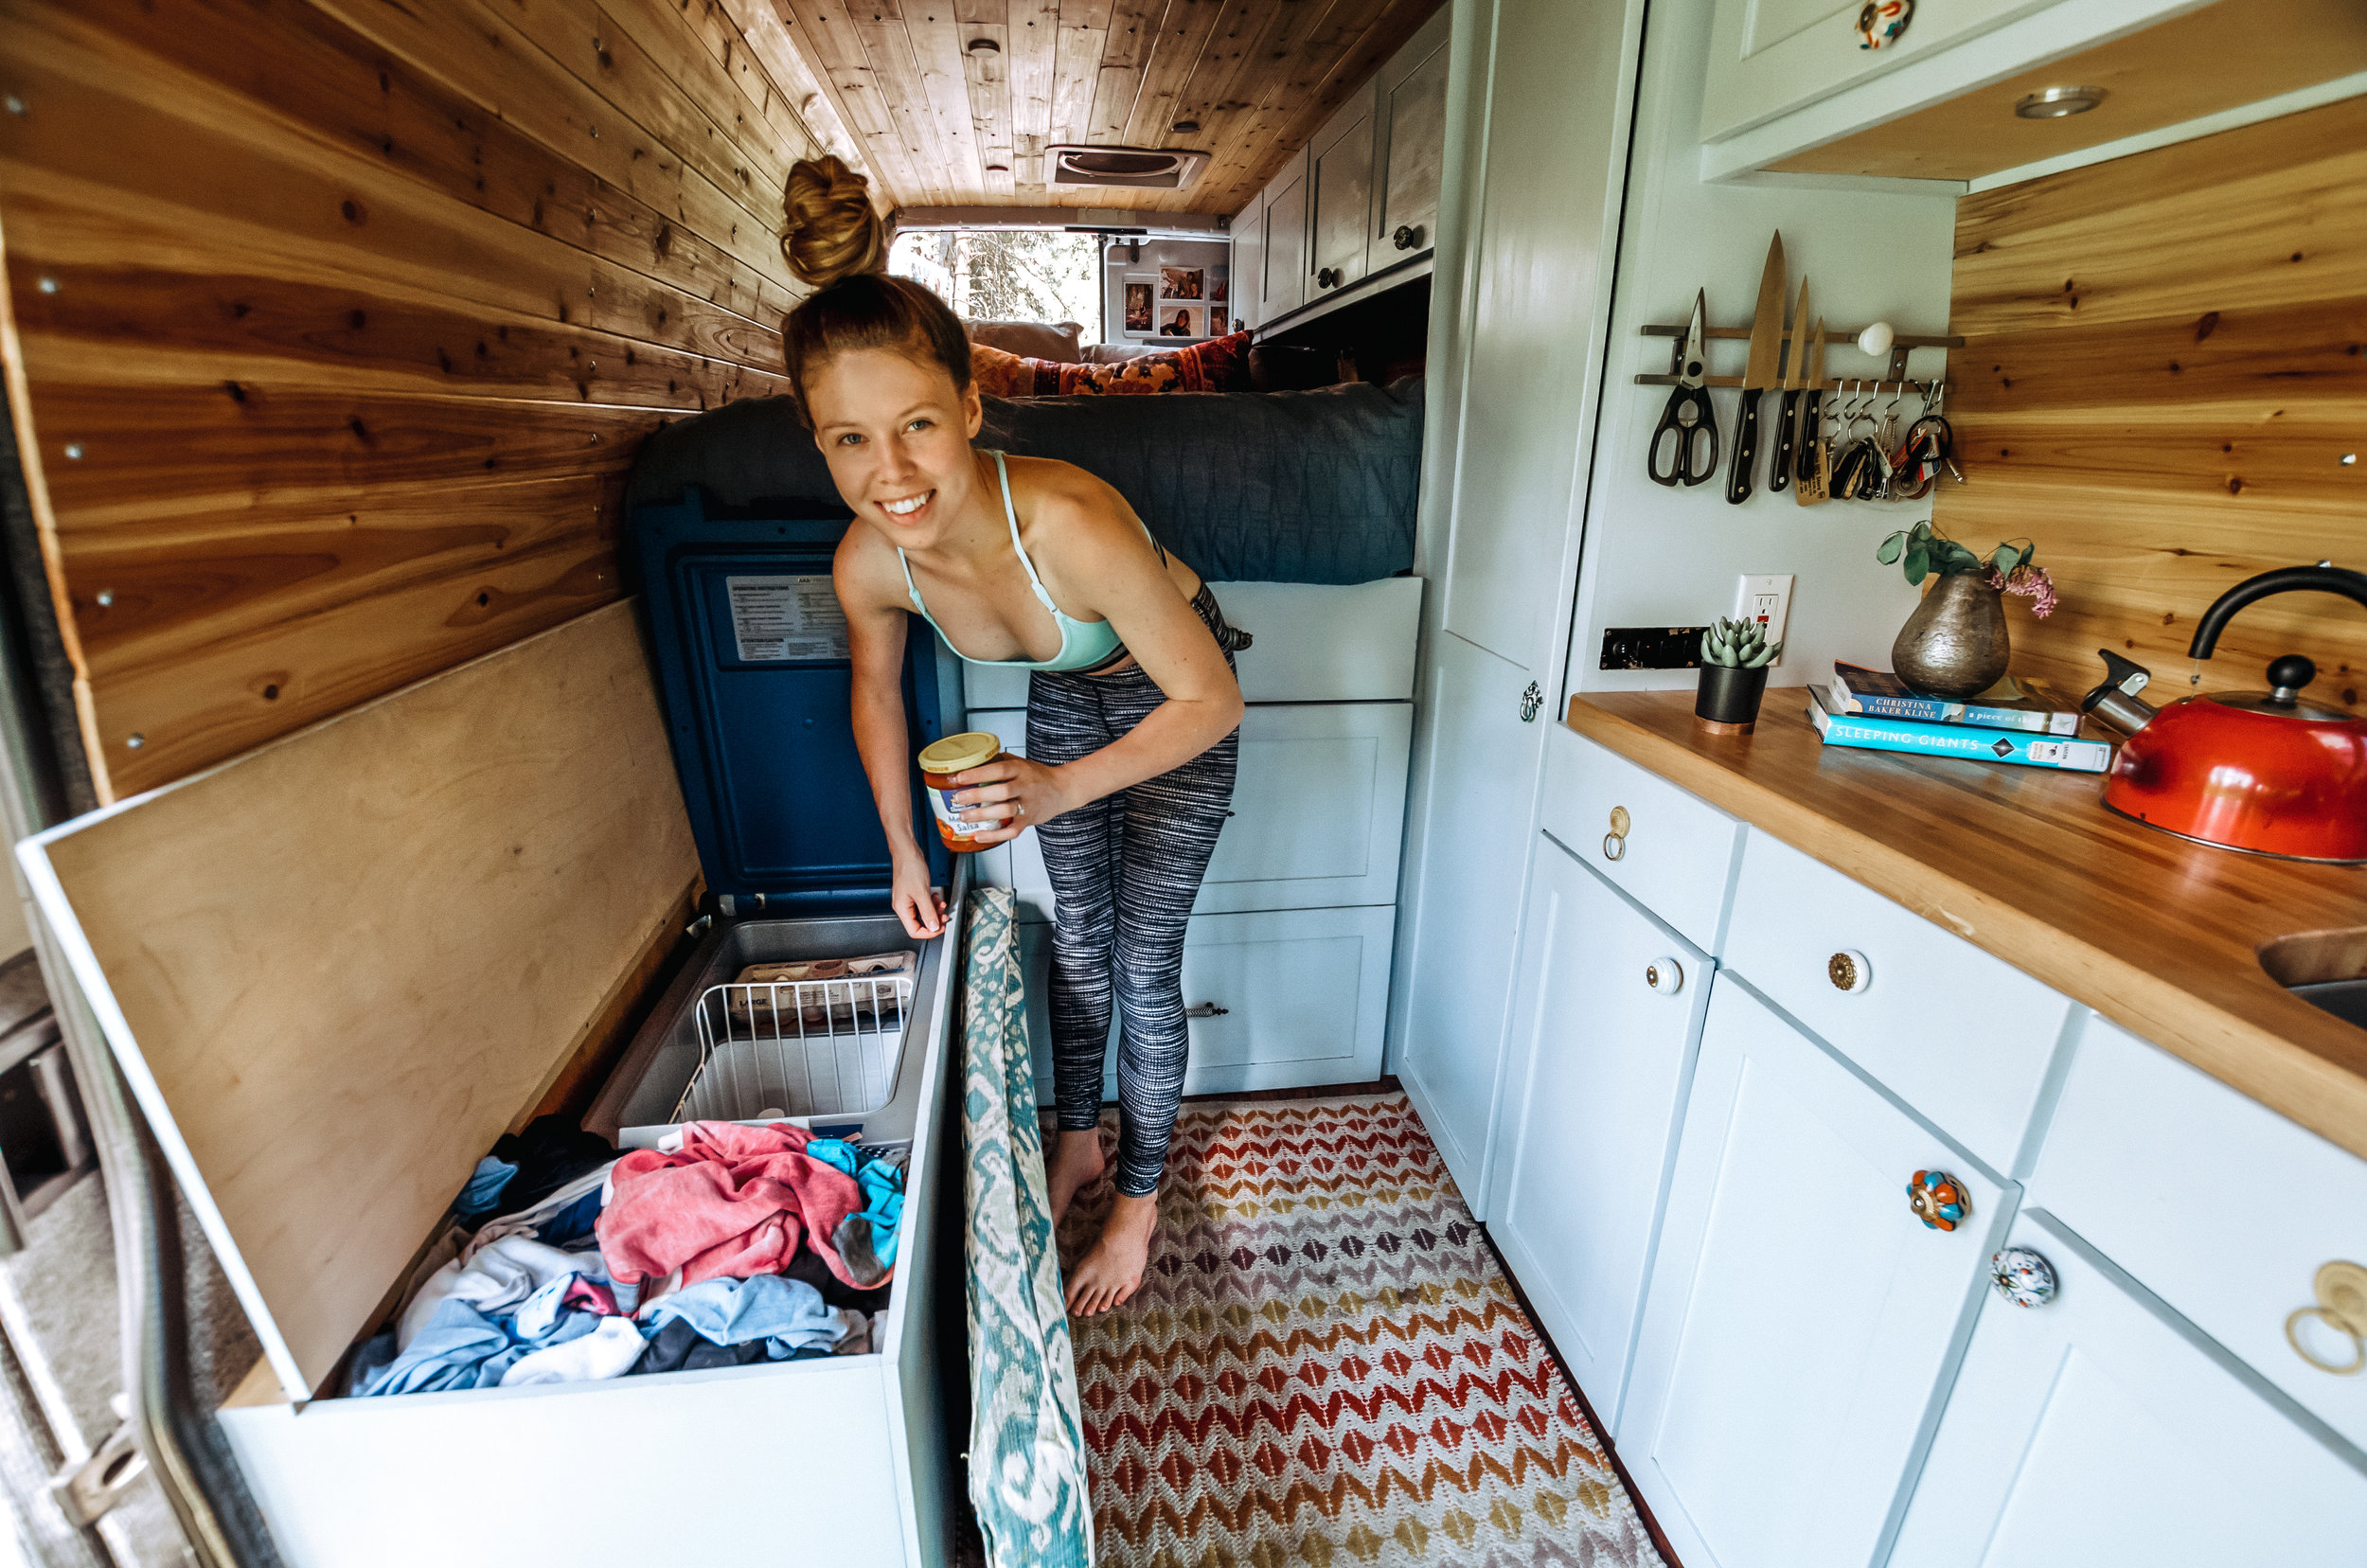
Some photos of our van and the adventures we get up to in it. It’s a 2005 158” WB retired FedEx van that took us approximately eight months to convert. Justin was working 60-80 hours a week as a resident and I was working and attending school full time throughout the conversion process, so if you’re looking to convert a van, don’t despair when you see how long it took us! A lot of people do it much quicker.


Since completing our van we’ve gotten a lot of questions about what items we purchased or what components we used to complete certain steps of the build, so created this list for those of you who are curious or looking for ideas of what to purchase for your own van build. While this list is certainly not exhaustive, it does cover all the main things in our van. We are a participant in the Amazon Services LLC Associates Program, an affiliate advertising program designed to provide a means for us to earn fees by linking to Amazon.com and affiliated sites. However, we are not sponsored by any of the companies that make the items listed below and as such, all the opinions about the products are our own.
What’s In Our Van
Renogy 300 Watt Monocrystalline Solar Kit - We decided to go for a kit versus getting all the individual components as it seemed like the easiest way to ensure we had all the right things. This kit comes with three 100 watt panels, the Adventurer Li 30A PWM flush mount charge controller, MC4 Connectors, MC4 adapter kit, tray cable, and corner bracket mount. We ended up having to make our own aluminum bracket mounts but only because we needed them to pivot slightly in order to position the panels the way we wanted on the roof. So far they’ve worked great and we haven’t had to do any kind of repairs or maintenance aside from climbing up on the roof to dust them off now and then.
3M Permanent Double Sided Extreme Mounting Tape - We didn’t want to drill holes in our roof to mount our solar panels so used this mounting tape from 3M instead. We used the corner bracket mounts that came with the solar panels, attaching them to the roof with the mounting tape, which is much stronger than those little 3M mounting strips with hooks people get for their houses. We did it on a warm day and warmed up the metal a little with a heat gun to ensure a good bond. We finished things off by caulking around each bracket. Two and a half years and thousands of miles later, I’m happy to say that our solar panels haven’t budged an inch and are still as firmly attached as when we first mounted them.
Blue Sea Systems CableClam - We used this to create a waterproof seal where we dropped the cables from the solar panel down through the roof. It may not be the prettiest, but we haven’t had any leaks.
Renogy Deep Cycle 200Ah Battery - Designed specifically for solar energy storage applications. It works great but like most batteries, loses some of its efficiency when it gets really cold. Last winter when we were living in the van up north and temps were dropping into the low teens (Fahrenheit), it wasn’t holding its charge as well as during the summer, so we’d recommend putting your battery somewhere where you can keep it warm (not sealed off from the heated part of the van in the “garage” like us) if you’ll be living in your van in cold conditions.
Blue Sea Systems Automatic Charging Relay - We installed this to enable us to charge our battery via the alternator when the van is running. It’s proven to be very useful when we’ve been in cloudy, rainy, snowy weather that leaves us with minimal or no charge from the solar panels.
TEMCo 1/0 Gauge AWG Copper Wire - We purchased this to wire the charging relay to the alternator and battery at the back of the van.
VertaMax Pure Sine Wave 1500 Watt Inverter - Converts DC to AC so we could put standard 120V outlets in the van. Features three grounded AC outlets and handles surges up to 3000 watts so we can use a blender.
Maxxair MaxxFan - We installed this fan above our bed and it’s been a life saver in hot weather. It features a vent, fan, and rain shield all in one so we don’t have to worry about leaving it open when it rains (we’ve done it many times and can testify that it doesn’t leak). It has ten 12 inch blades with two fan speed settings and the ability to be switched to vent mode which is pretty nice. Even though it doesn’t create a big wind current like house fans we’ve used, it still cools us down nicely when we’re hot and sweaty.
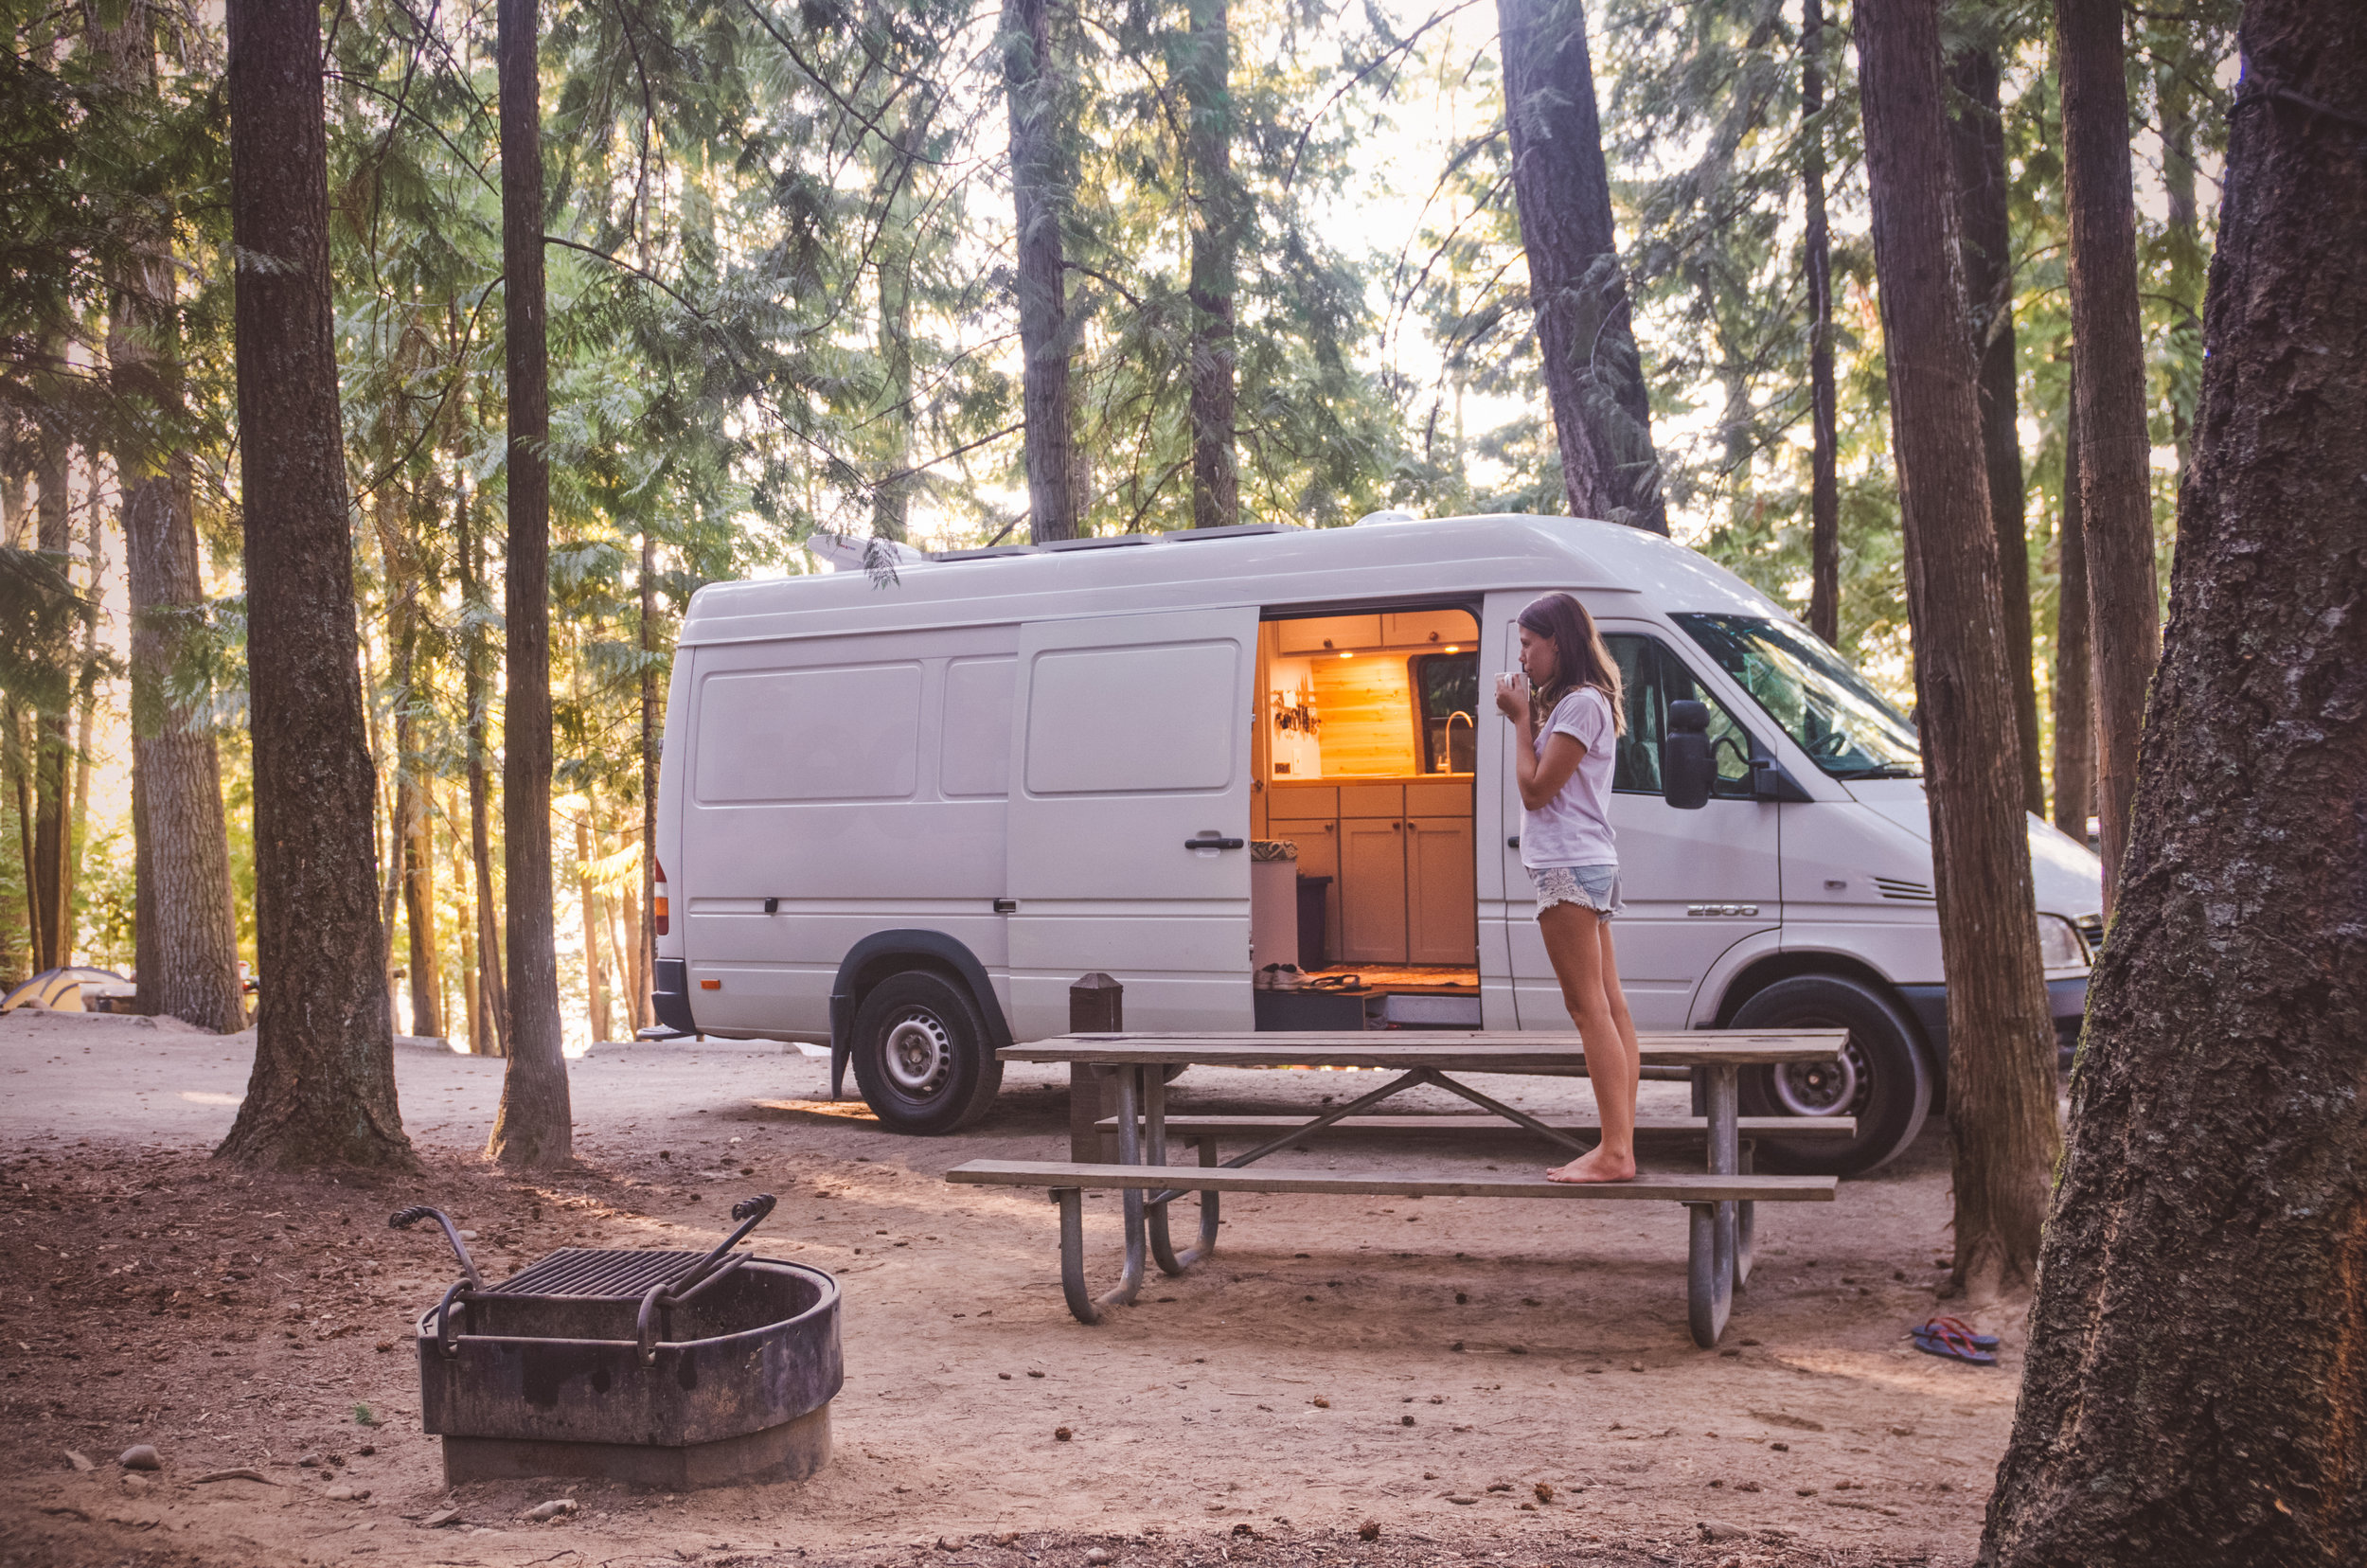
Peninsula Glass Motion Windows - We purchased a side window for our van from this company and had a really great experience. They make windows for Sprinter, Transit, ProMaster, and Metris van conversions for a whole range of years and lengths. Their windows feature 1/4” tempered safety glass with clear or dark gray tint options. We opted for the dark tint and it’s really good. From outside the van you can’t see through it unless you have your face pressed against the glass, which allows us to have the window cover off for light while still maintaining our privacy. The main reason we went with this company though was because the part of the window that opens (t-slide configuration slider with a screen and window lock) was a bit larger then what we saw from other brands and we wanted as much ventilation a possible. Because they make each window to order, their website states that it can take up to 30 days to receive your purchase, but I think we got ours in around 20 days.
Planar 4kW 12V Diesel Heater - Russian made diesel heater similar to ESPAR and Webasto. We opted to go with it because we found it for a significantly better price then the other two. It features 13,600 BTU/hour and definitely gets our van very toasty very quick even in super cold temps. The two downsides in our opinion are that the manual is poorly translated at times and therefore difficult to follow, and the control module is confusing. If you can get past those two things it does exactly what it’s suppose to. Check out our Planar heater installation blog post for more information.
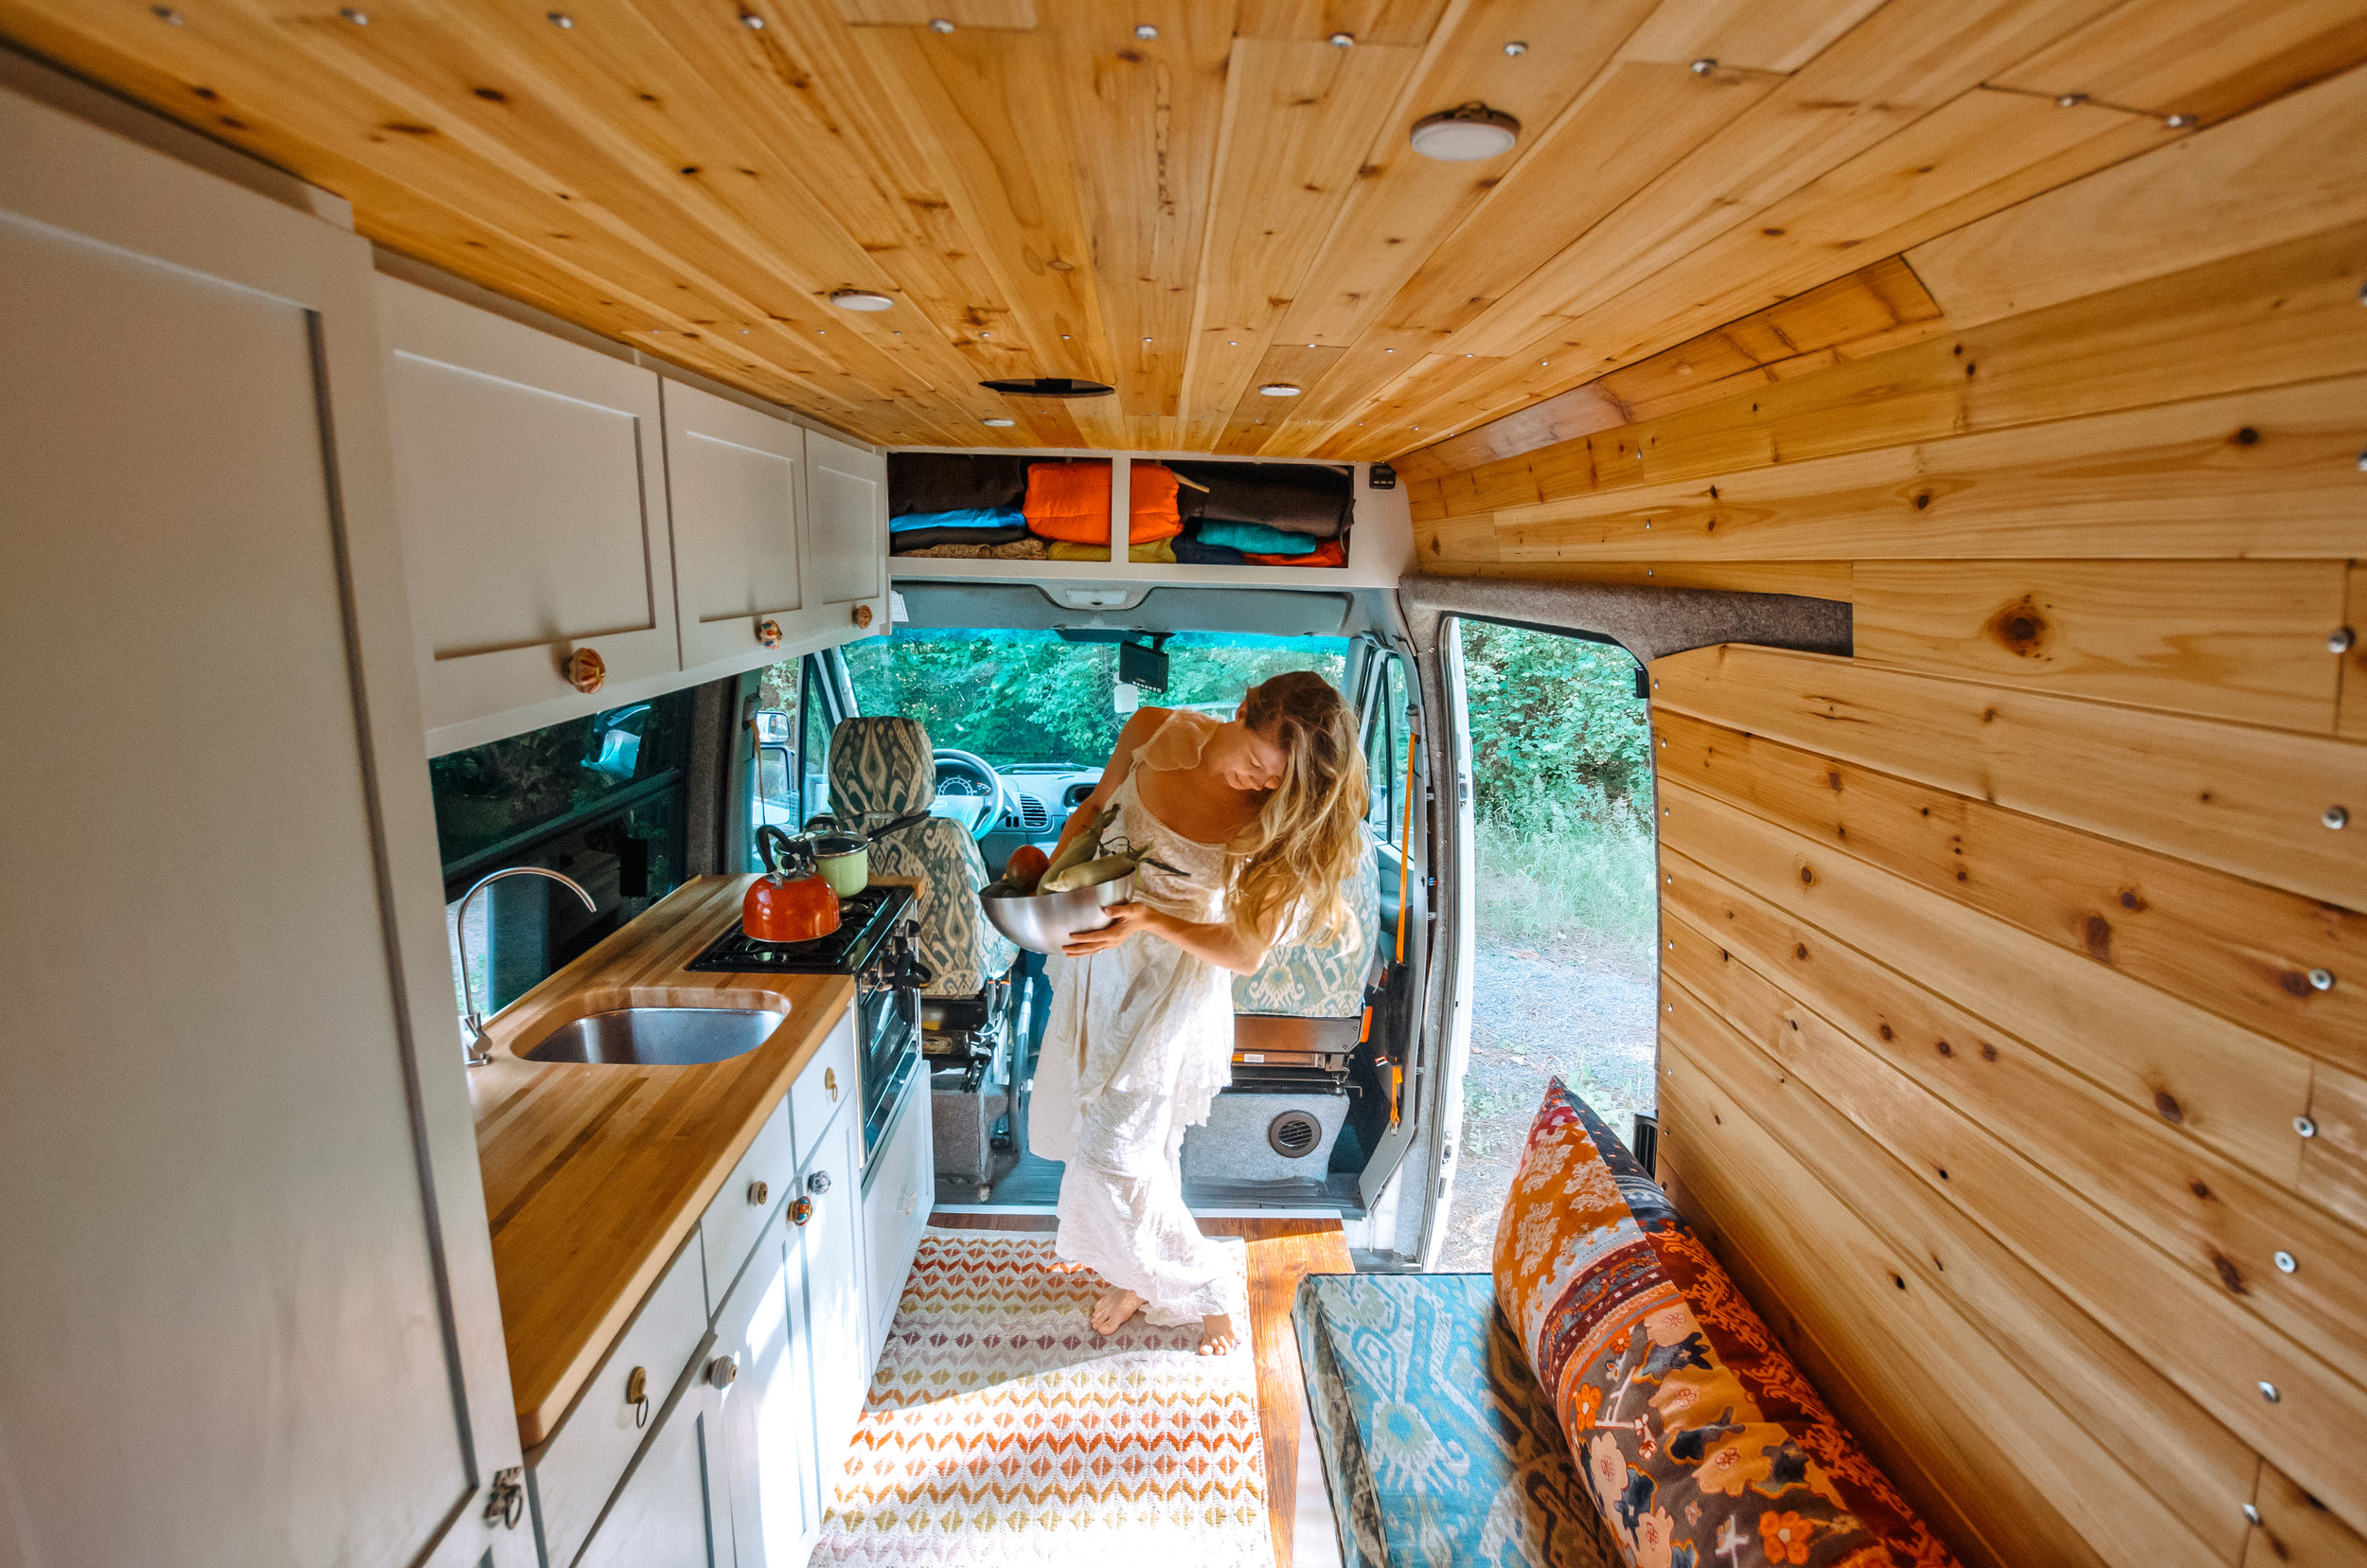
Camp Chef Outdoor Oven - A very handy oven/range combo. The oven has two racks, fits a 9x13 inch pan, and can be heated to 400F. There are two 7,500 BTU brass range burners. Matchless ignition. We spent a lot of time looking for an oven for our van. We started by looking for RV specific ovens but found that even used ones were pretty expensive. Then we saw one of these Camp Chef outdoor ovens in a van converted by a company and decided to give it a go after finding one on sale. We had to put some serious thought into how to install it safely though since it’s meant for outdoor use. Check out our oven installation blog post if you want more information about how we did it. So far it’s worked great! I love the gas range and have successfully baked a number of things in the oven. My only beef with it is that the oven can’t be set to an exact temperature, just low, medium, or high, which means you have to kind of just sit there and watch the temperature gauge.
Camp Chef Bulk Tank Hose Adapter - The Camp Chef oven comes ready to use with 1 LB disposable propane bottles. We wanted to use a much larger refillable tank so purchased this handy 5 foot hose with the proper adapters to do just that. The appliance end features a 3/8" female flare while the inlet has a 250 male quick connect.
Flame King 20 LB Steel Propane Cylinder - This is the size we decided on for our oven and even though it’s much larger than the disposable bottles, it still fits neatly under the counter. Features an overflow protection device and gauge so you at least know to some extent how much propane is left. And just in case you’ve been wondering, it’s super cheap to refill this size of tank ($10 or less in our experience) and it lasts us for many months. In fact, our first tank lasted us eight months doing just one cooked meal a day with minimal baking.
Houzer CS-1407 Undermount Prep Sink - We wanted a sink that didn’t take up the whole counter but was still large enough and deep enough to wash pots and pans. This sink has worked great on both accounts. It’s stainless steel with inside dimensions of 12.5" wide X 14.375" long X 6" deep.
KES Z501C Faucet - A dainty faucet to fit our kitchen’s smaller proportions.
Seaflo 12V Water Pump - We decided to install an electric water pump versus a hand pump and this one is nice and compact.
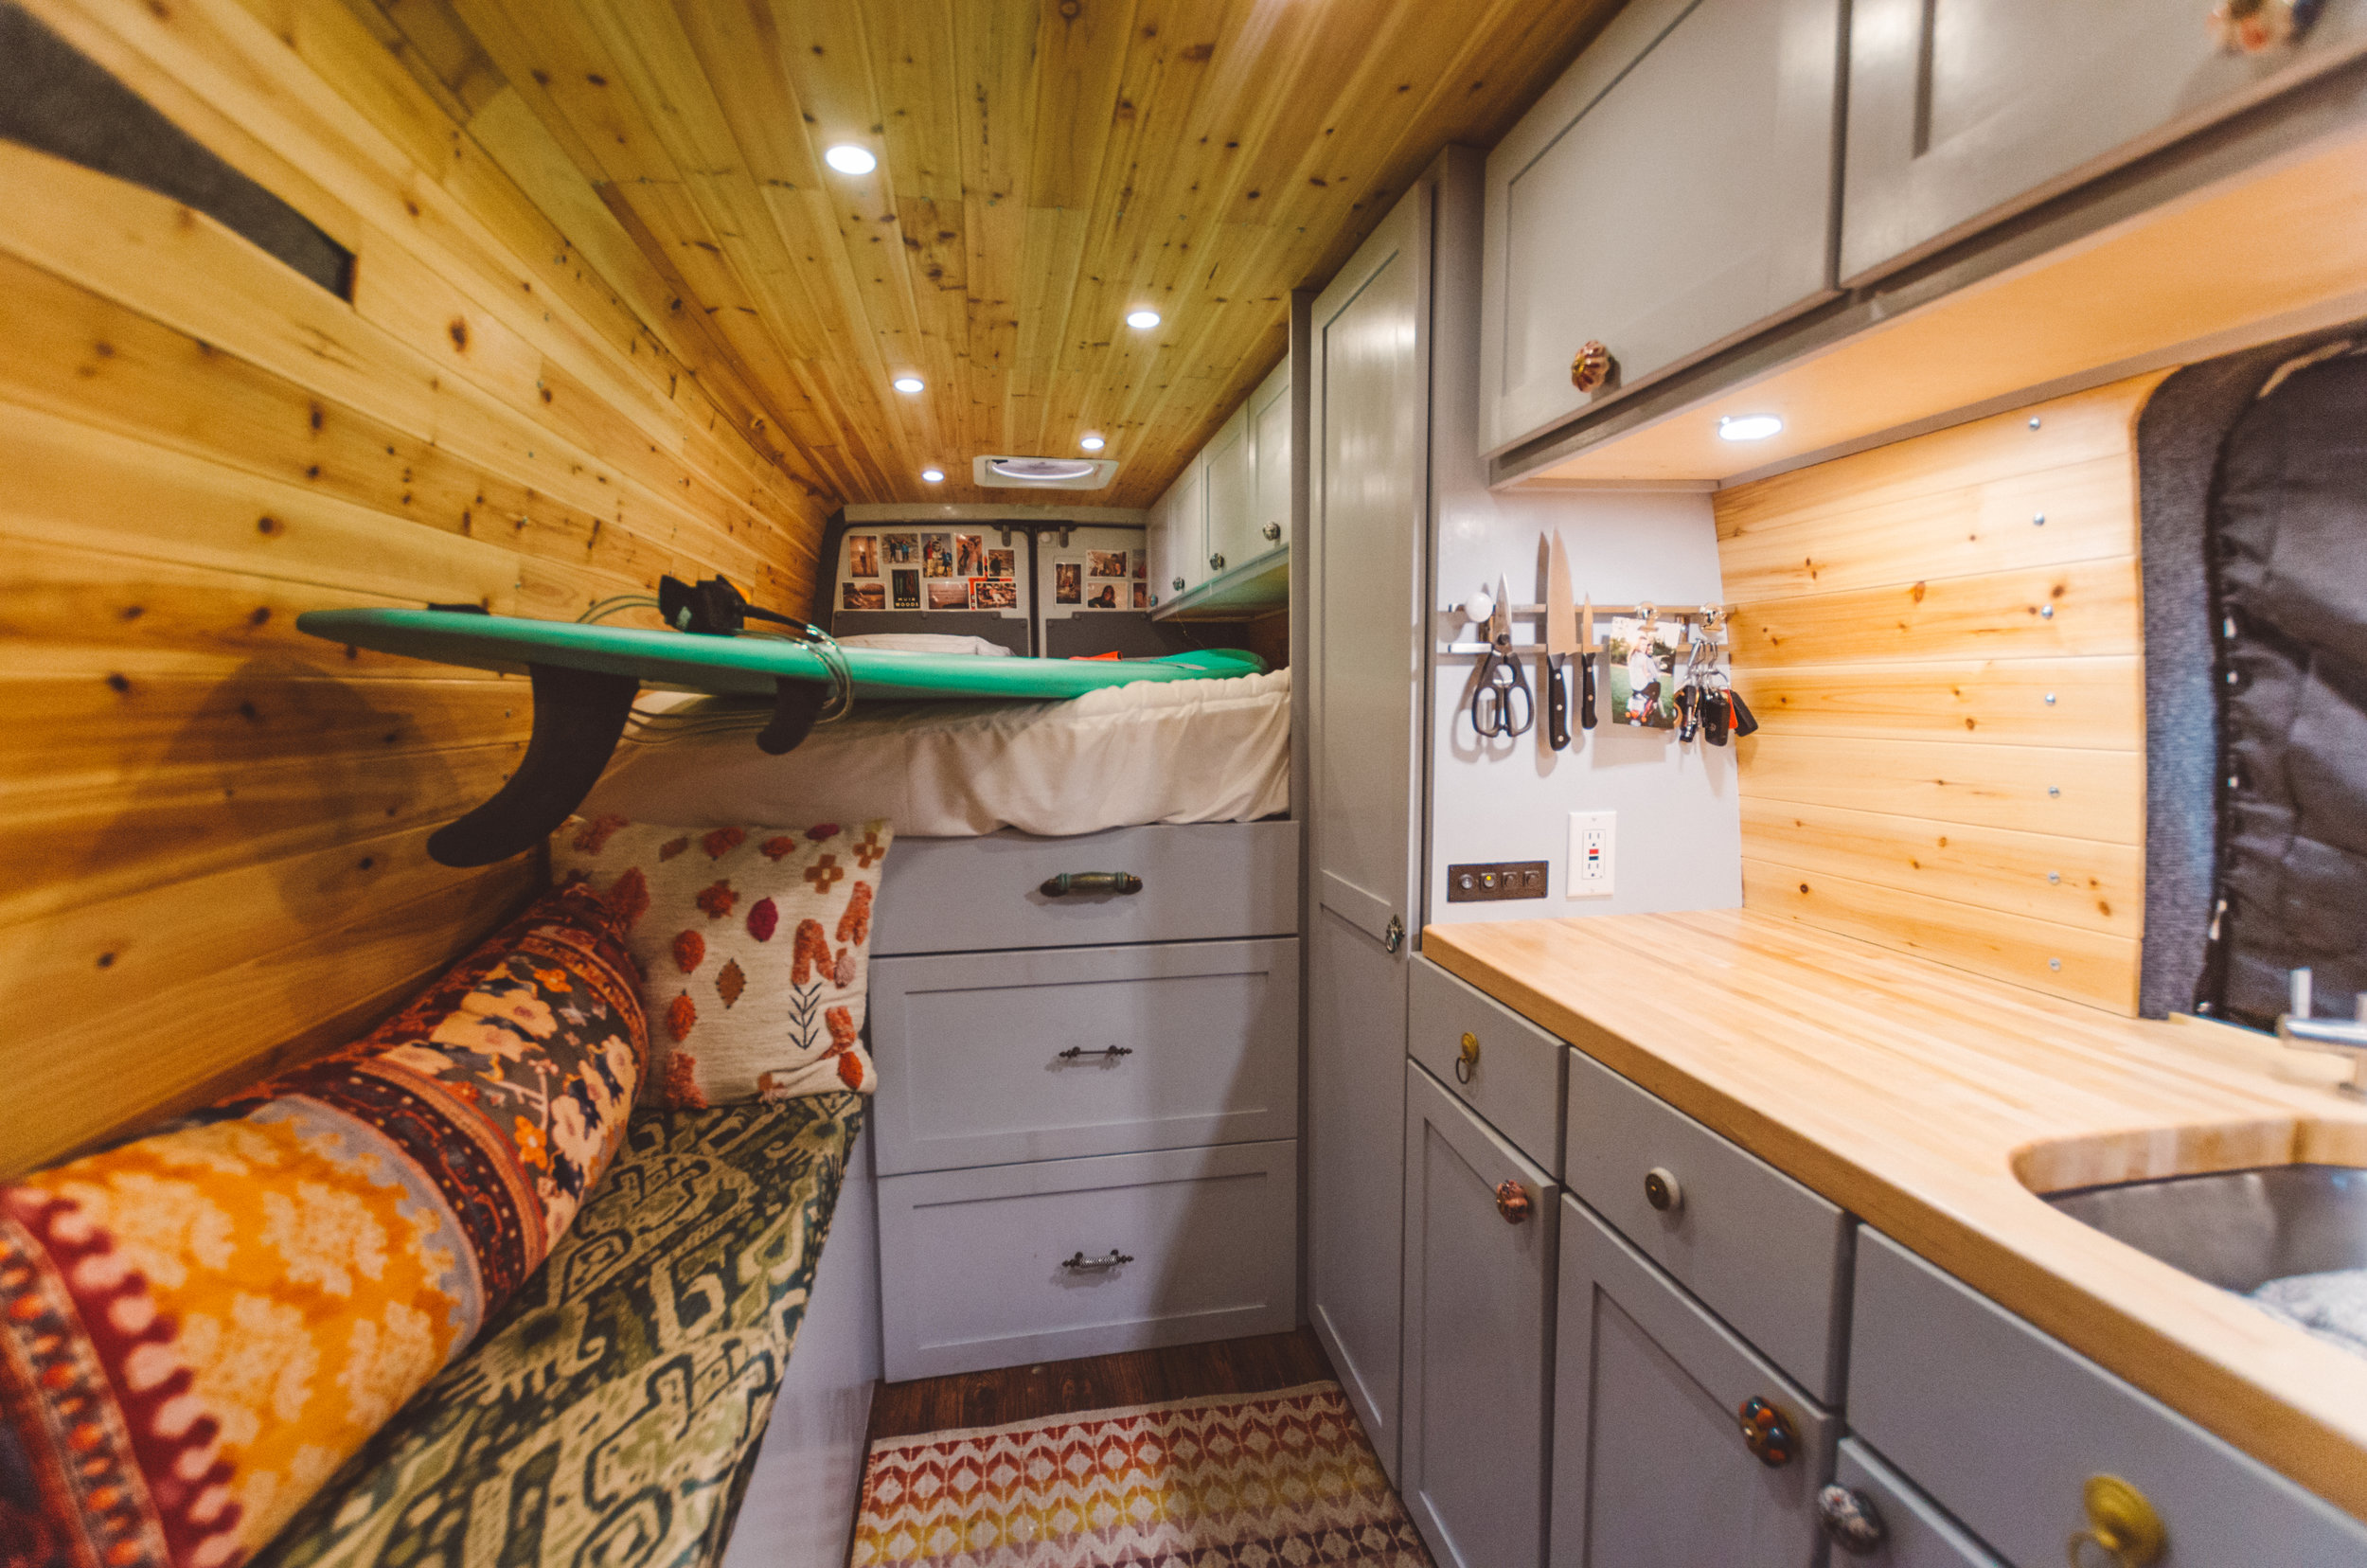
LED Under Cabinet Lighting Kit - We installed these 3000K warm white puck lights under the upper kitchen cabinets to shine down on the counter and like the way they look more than the Ikea puck lights we installed in the rest of the van, even though they have a slightly bulkier profile. They’re brighter and don’t have the little exposed wire loop that the Ikea ones have.
ARB 50 Quart Fridge Freezer - This chest style fridge/freezer (depending on what temp you set it to - it can go as low as 0 degrees Fahrenheit) has two compartments, one with a handy removable divider, to keep things organized. My favorite feature though is the drain at the bottom so you can wash the whole thing out if something spills, which unfortunately has happened several times. Even though it may be a lot smaller than a regular house fridge, we’ve found we can put quite a lot in it. The main internal compartment measures 13.27" deep, 11.22" wide, and 15.79" high while the second compartment measures 5.95" deep, 11.22" wide, and 8.11" high.
Fulterer 5400 Heavy-Duty Drawer Slide - We got these 50 inch heavy duty drawer slides for our pull out table, which we made quite big to fit my keyboard and have room to eat and cook. We got the heavy duty ones so that we could have the table fully extended without the need for some sort of support at the end.
Linenspa 5 Inch Memory Foam Mattress - I like firmer mattresses so we got this queen sized mattress which has 4 inches of firm foam topped with 1 inch of gel infused memory foam. We finished it off with a mattress topper and honestly have to say it’s one of the more comfortable beds we’ve slept in.
Seat Swivel - We decided to put a swivel on the passenger seat so it can be turned around to add to the seating in the back. The link will take you to a page with a number of Sprinter seat swivels for different years. We purchased the 2001-2006 Sprinter swivel and it fit perfectly with the factory drilled bolt pattern in the floor which made for a pretty straight forward install.
TrafficMASTER Indoor/Outdoor Carpet - We bought a roll of this carpet to trim a number of surfaces in the van, such as around the side window, back doors, and seat bases. It’s similar to an automotive carpet but thinner so it can easily be cut to size with scissors or a razor blade. What we found worked best was cutting it to basically the right size and shape and adhering that to whatever surface we were covering, then coming along and trimming it in place to an exact fit with a razor blade.
3M Super 77 Multi-Purpose Adhesive Spray - This is what we used to stick down the carpet trim. It doesn’t drip when sprayed on vertical surfaces and bonds to foil, paper, cardboard, fabric, plastic, metal and more. It’s done an excellent job in most of the carpeted areas of our van, but the carpet has peeled up a bit around the sliding side door twice, requiring me to stick down the edges again.
TrafficMASTER Vinyl Flooring - When we were building out our Sprinter, Justin took care of a patient who’d spent his entire career doing flooring and he recommended we put in vinyl flooring in the van. He felt it would be the sturdiest most weather resistant option, so that’s what we did. We messed up though and didn’t install it with a heat resistant adhesive, just something normal that usually works for residential flooring because it doesn’t reach triple digits inside most homes. It was winter when we installed it and so we weren’t even thinking about the fact that it would turn into an oven in the van at times during the summer. When we reached summer and it was 100F+ in the van at times, the floor began to buckle and got all lumpy looking as the adhesive gave way in places due to the heat. As soon as the weather got cooler it settled back down and became flat again, but we’re planning to pull it all out at some point and put in some new flooring with the proper adhesive.
EuroCampers Ladder - This high roof driver’s side back door ladder for Sprinters hooks over the top of the door (you can screw it in at the top if you so desire) and bolts on at the bottom of the door. We installed it to make it easier to climb up on the roof to clean off the solar panels and so far it’s been really sturdy and awesome.
Van Related Posts From Our Blog


Our step by step DIY guide to painting your van with bed liner + everything we learned (which was a lot!) while transforming our Sprinter van from white to orange with Raptor Liner.